Menu
Geodesic Dome

Zip Tie Domes

Geodesic Dome Kits that are Easy to Build!

Customer Reviews of our Geodesic Dome Kits

Zip Tie Domes

Geodesic Chicken Coop
Geodesic Dome Kits that are Easy to Build!

Customer Reviews of our Geodesic Dome Kits

Zip Tie Domes

Customer Reviews of our Geodesic Dome Kits

Click Here to Call Us:
1-931-858-6892

Jamie Meredith - Customer Review of our 16' Geodesic Chicken Coop Kit

Tunnels for the Chicken Dome

On the ATF Farm


We needed a moveable coop solution for our girls (and boy) and did not think a traditional chicken tractor was big enough for 12 chickens and we have a large yard, so we invested in a 16' geodesic dome from Zip Tie Domes ($420).  
I highly recommend the kits that John and his family offer!  Super people!  

The dome took about 2 hours with two people to assemble and is super strong, light and flexible.  

I can move it by myself using a length of rope attached to two points and then pull it with my lawn tractor.  

We covered it in plastic fencing that we had around the property and a few tarps to provide shade.  
We will soon cover the whole dome with a parachute to create a wind block for winter use.


How to Purchase This 16' Geodesic Chicken Coop Kit

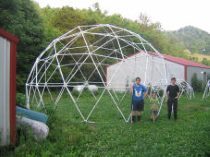
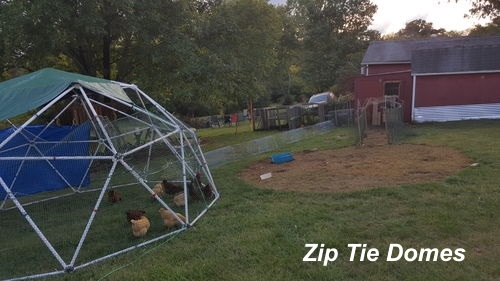
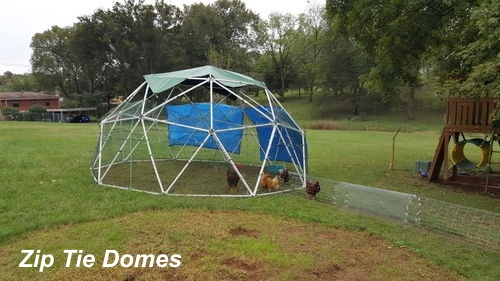
You can see in this photo where the dome was previously.  
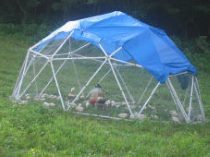
We left it there for 3 weeks, which was FAR to long.  One week max is the new plan.  
They still have created some holes in the yard even at one week, but nothing that a little dirt will not fill.  Fortunately, the grass has started growing back in the old spot.
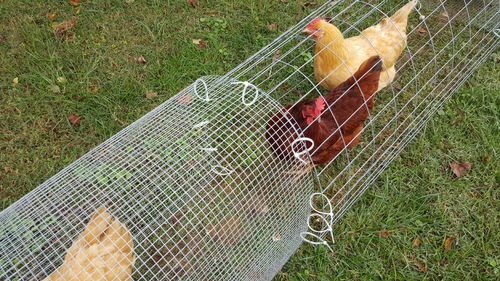
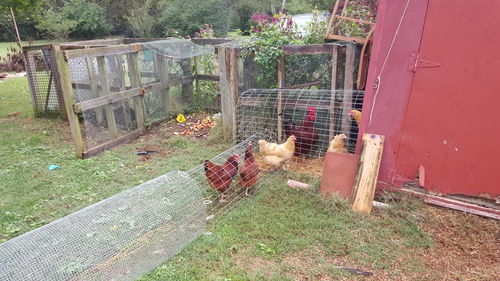
Tunnels

In order to get the chickens from the coop to the Chicken Dome, we had to come up with a tunnel system.  Below are instructions on how we did it.  

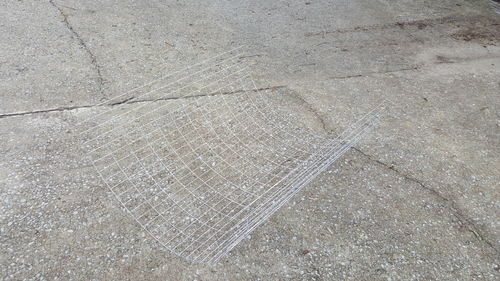
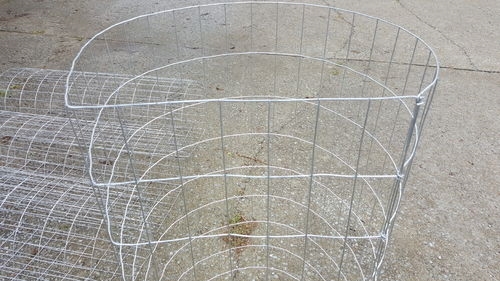
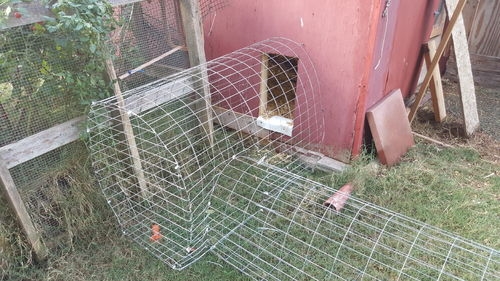
I started my Chicken Tunnels using 1/2" hardware cloth but found it to be overly flexible and much more expensive (but it works as you see in the photos).   I switched to the same material as others, 2"x4" galvanized fencing in 4' width.  I made my tunnels with a 14" base, and they are about 16-18" tall.  The rooster has to duck down a little to get through but he seems to do fine.  

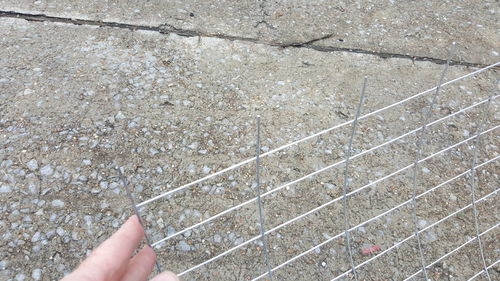
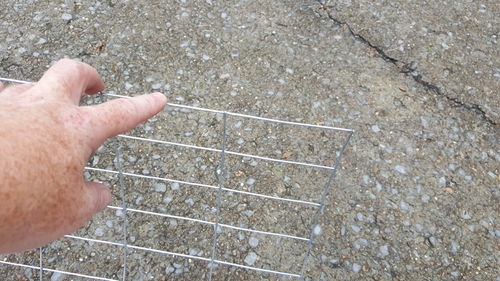
Here are some quick instructions for how I built mine.  Be very very careful and wear gloves when building your tunnels.  Once this wire is cut, it is very very sharp and will cut you.  I recommend using a pair of lineman's pliers to cut and a pair of needle nose pliers to handle the bending. 

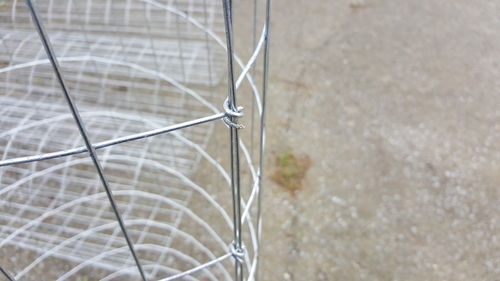
1. Cut the fence in 60" lengths.  Be sure to cut on one end close to the joint on the wire and on the other end leave a long piece of wire to use for wrapping.


4' x 60" section


One end has wire length left from the previous close cut on the joint.  You will use this extra wire to secure the hoop portion to the bottom.


Cut the wire close on one end of the section when cutting off of the roll.

Once you have cut a section off, from the end that was cut close to the joint, count in 14" or seven squares, carefully bend to a 90 degree angle at the 14" mark to make the bottom of the tunnel.  


Once you have the bottom formed, use the long wires that you left when cutting the fencing to wrap around the part that is now the bottom.   I probably should have trimmed the wires before trying to wrap them but it only takes a few extra min to just wrap a little more around.   Be sure to bend the wires so that they will not poke the chickens or you when you are moving them.   The key is to make the joint on the ground where it is least likely to poke someone.  


Once you have secured the hoop to the bottom, set the tunnel section bottom side down and roll the top back and forth to form a uniform hoop.   I then connected the sections using zip ties.   I placed one at the top, one or two a few inches from the top and then several along the bottom to thwart our bandit chickens from slipping out.   I also secured the zip ties just enough for it to not come apart.  This will give the joints between each section some flexibility for routing around our yard.


Here you can see the area where we left the dome for three weeks in error. 


Here I created a vestibule from the pop door and have two directional options for running tunnels out from the coop.

For those who are wonder, ATF stands for The Accidental Turkey Farm, the name that was given to our homestead here in Nashville by friends and it has stuck.  If you have questions or would like to get more information, feel free to reach out to me and I will do my best to help!  Hope this is helpful for others.  I will post some video later showing us moving the coop from one location to another.

How to Purchase This 16' Geodesic Chicken Coop Kit


To place an order online, visit our Online Catalog.

For a telephone order, call us at 1-931-858-6892.

Or, go to our Contact Us page to send us an email.